
See the bigger picture. Before the first brick is laid.
In your VATRA Studio, we take your designer’s approved drawings and walk you through them before work starts: what each drawing means, the decisions still open, and how the finished rooms will look. This page shows the idea on a real home, from drawings to finished rooms.
Illustrative example using a home in the London Borough of Barnet, built by Andrei Barote’s team from January to August 2026, before VATRA was formed. It is not a project commissioned or delivered by VATRA Developments. The drawings here are illustrative sketches prepared from the finished home; on your project, your Studio is built from your own designer’s approved drawings.
Every home starts on paper
Before anything is built, the drawings set out what the house will look like and how each room works. In your Studio we go through them with you, drawing by drawing, so you know what to expect on site. Tap any drawing to see it larger.
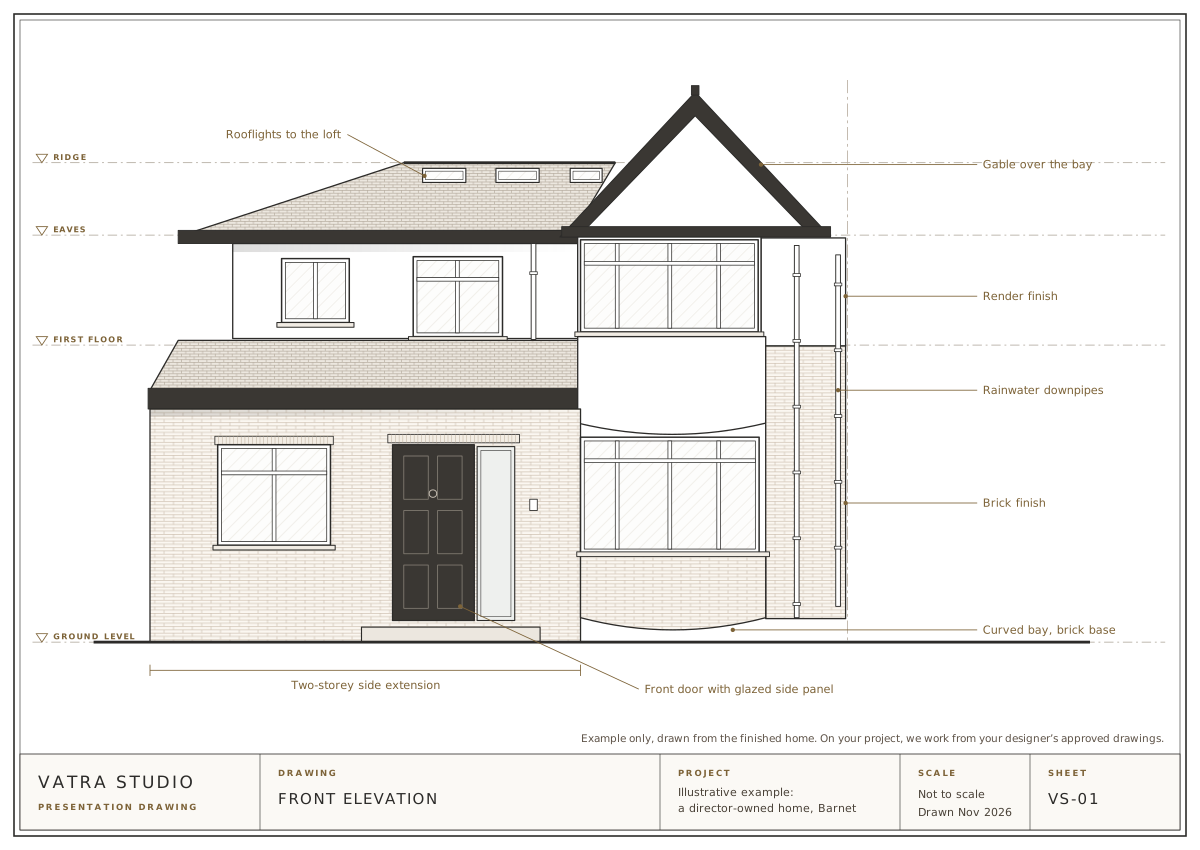
Front elevation. Two-storey side extension, curved bay and a gable over it. 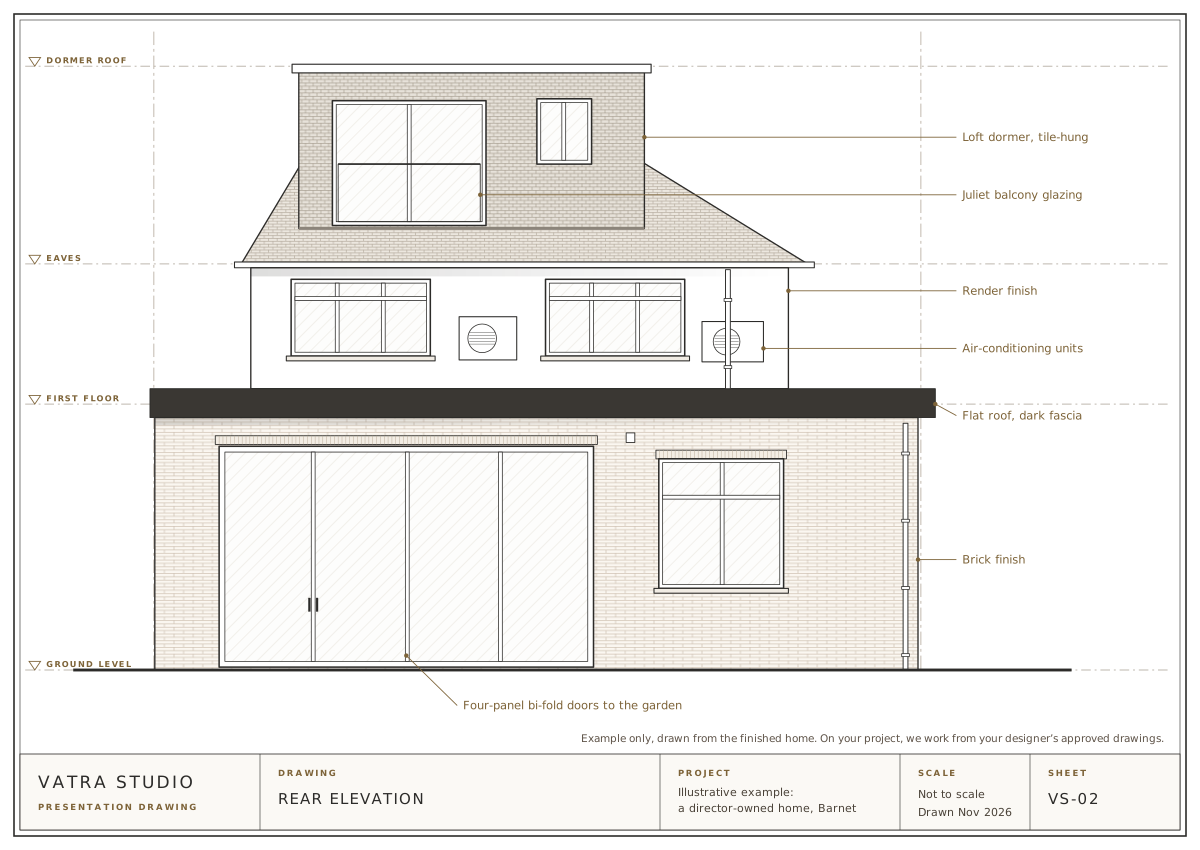
Rear elevation. Loft dormer, rendered first floor and a brick rear extension. 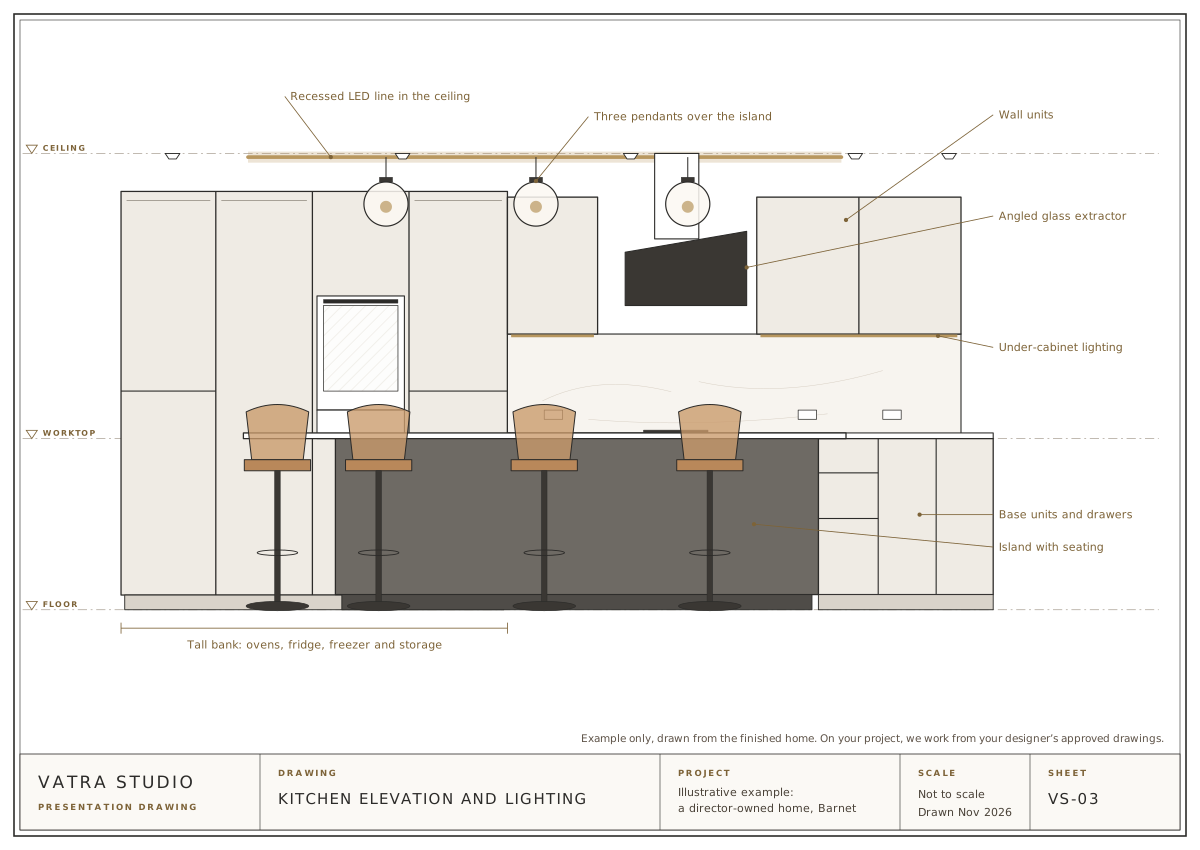
Kitchen and lighting. Tall bank, island and the lighting above it. 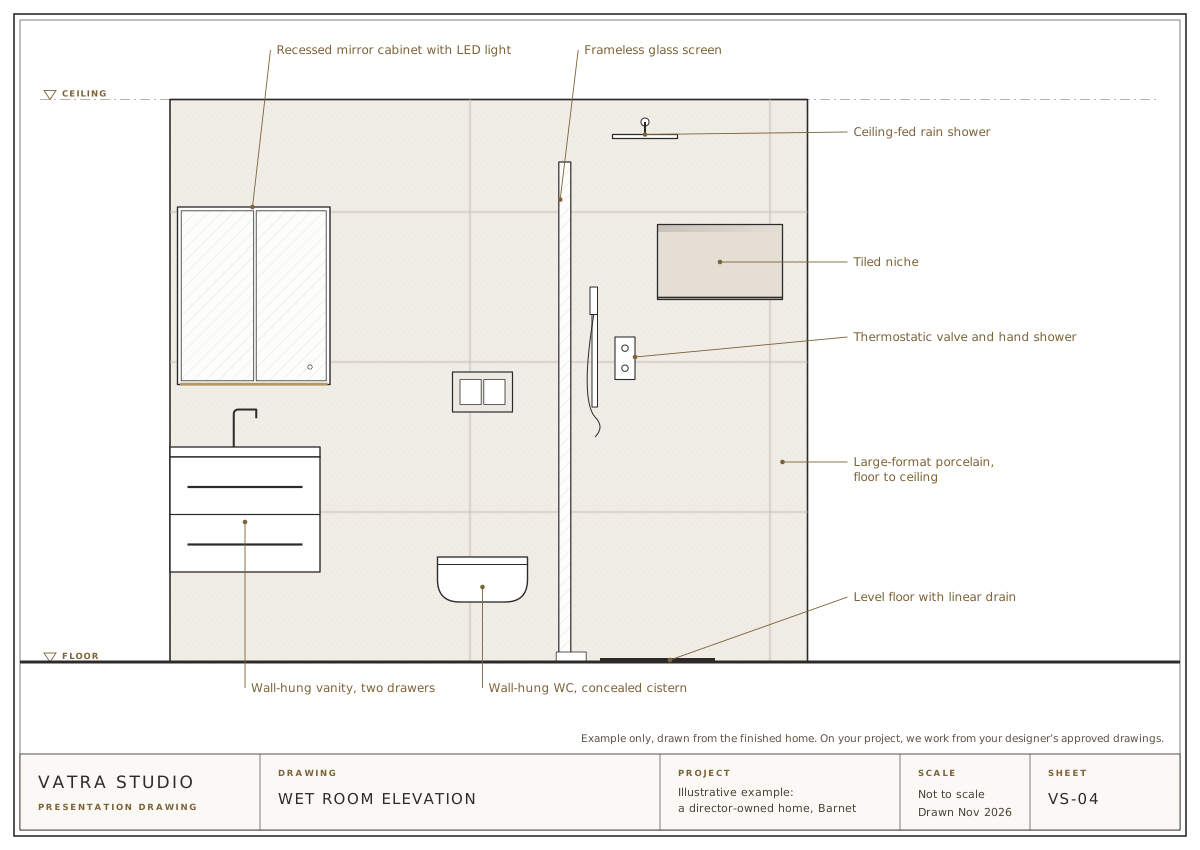
Wet room. Every fitting placed on the wall before tiling starts.
Example drawings for illustration, drawn from the finished home and not to scale. Floor plans are not shown, for the owners’ privacy. On your project, your Studio uses your designer’s approved drawings.
The choices that are easy to change now, and costly later
Finishes, fittings and lighting are cheap to change on paper and expensive once they’re built. These are the kinds of decisions we put in front of you, with the date each one is needed by.
OUTSIDE
- Brick on the ground floor, render above
- Tile-hung loft dormer
- Flat roof to the rear extension
- Bi-fold doors out to the garden
KITCHEN
- Tall bank for ovens and storage
- Island with seating on one side
- Wall units with lighting beneath
- Hob and extractor position
WET ROOM
- Large-format porcelain, floor to ceiling
- Wall-hung vanity and WC
- Recessed mirror cabinet and tiled niche
- Level floor with a linear drain
LIGHTING
- Downlights laid out room by room
- Three pendants over the island
- A recessed LED line in the ceiling
- Every switch and socket agreed on the Layout Sign-Off
The kitchen was first drawn with a ceiling coffer over the island. It became a recessed LED line that follows the island instead. A change like that is simple before the ceiling goes up and costly after it, which is why the Studio puts these decisions on the table early.
The result
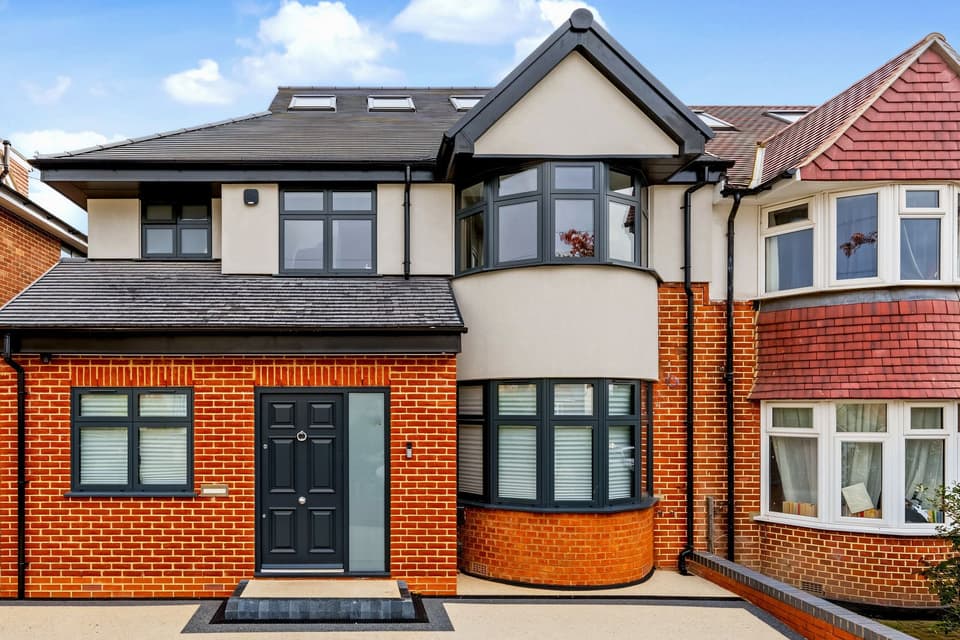
Front elevation 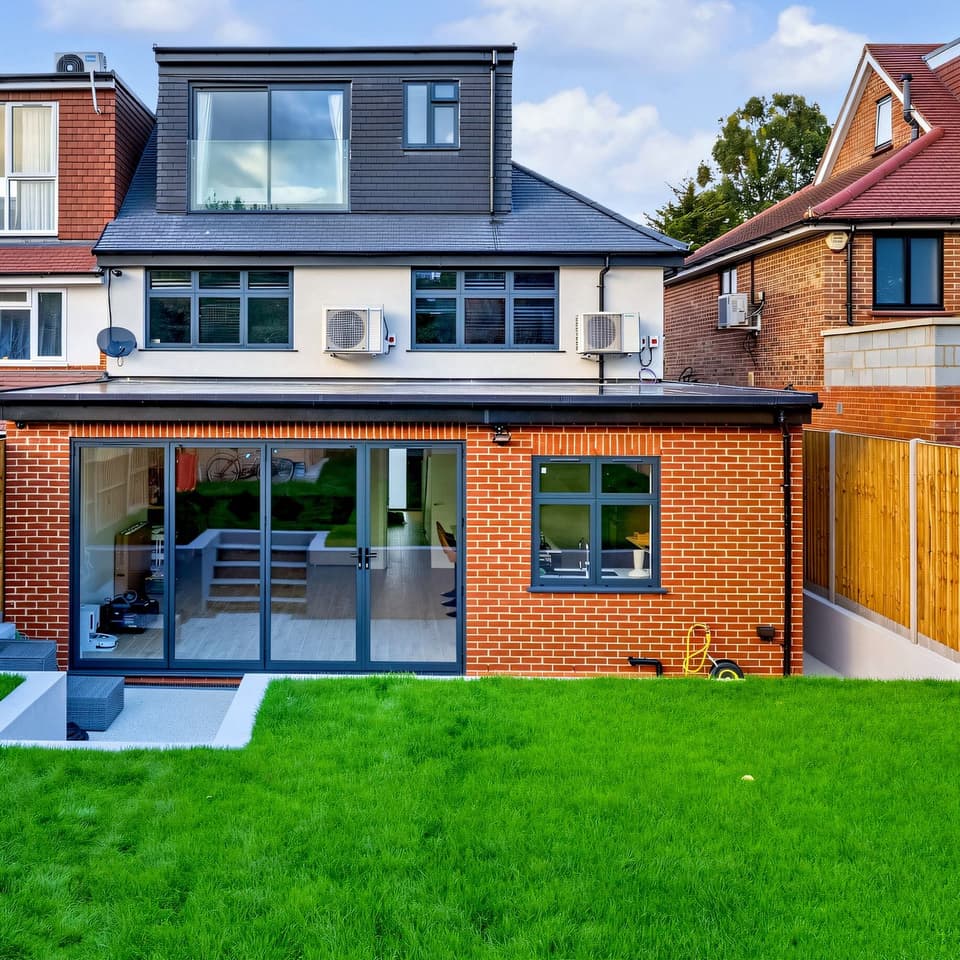
Rear elevation 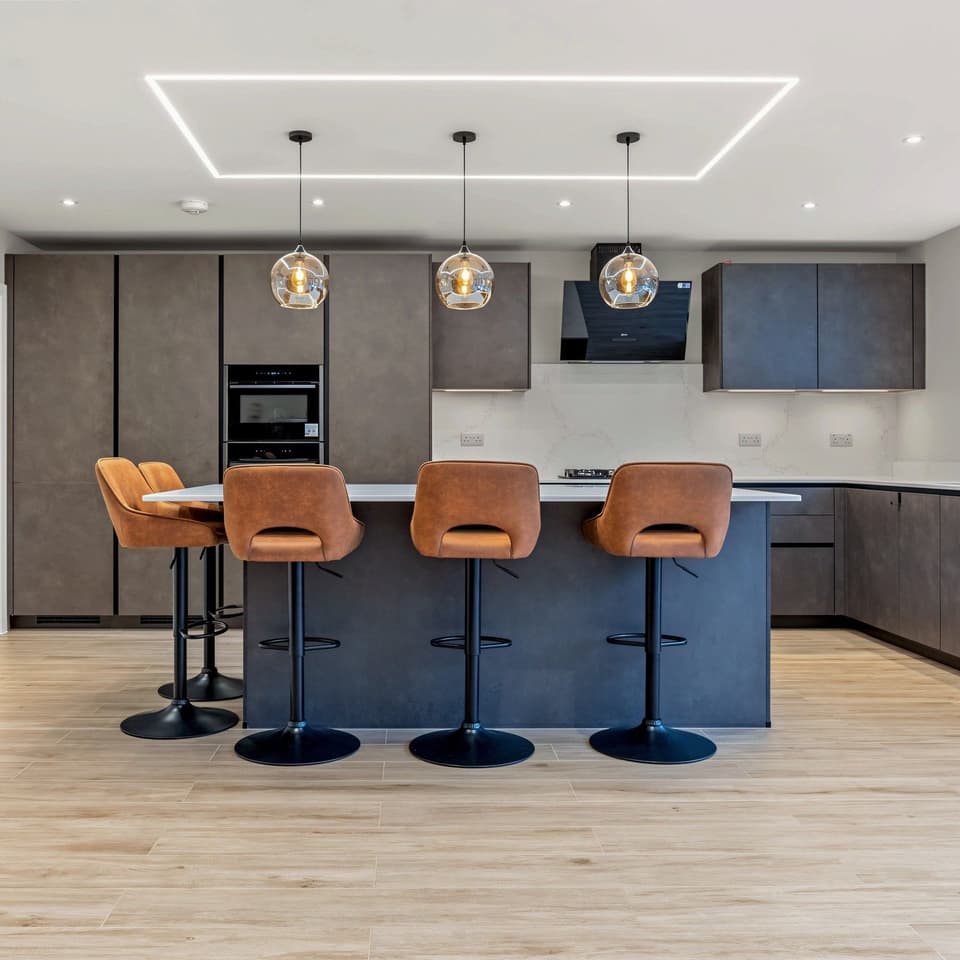
Kitchen 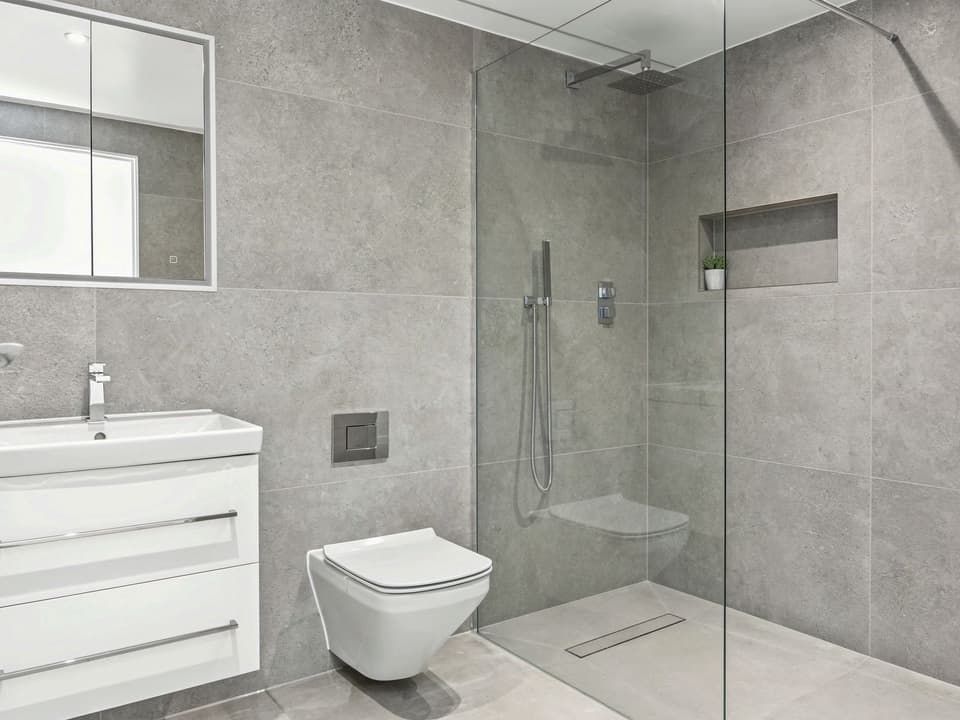
Wet room 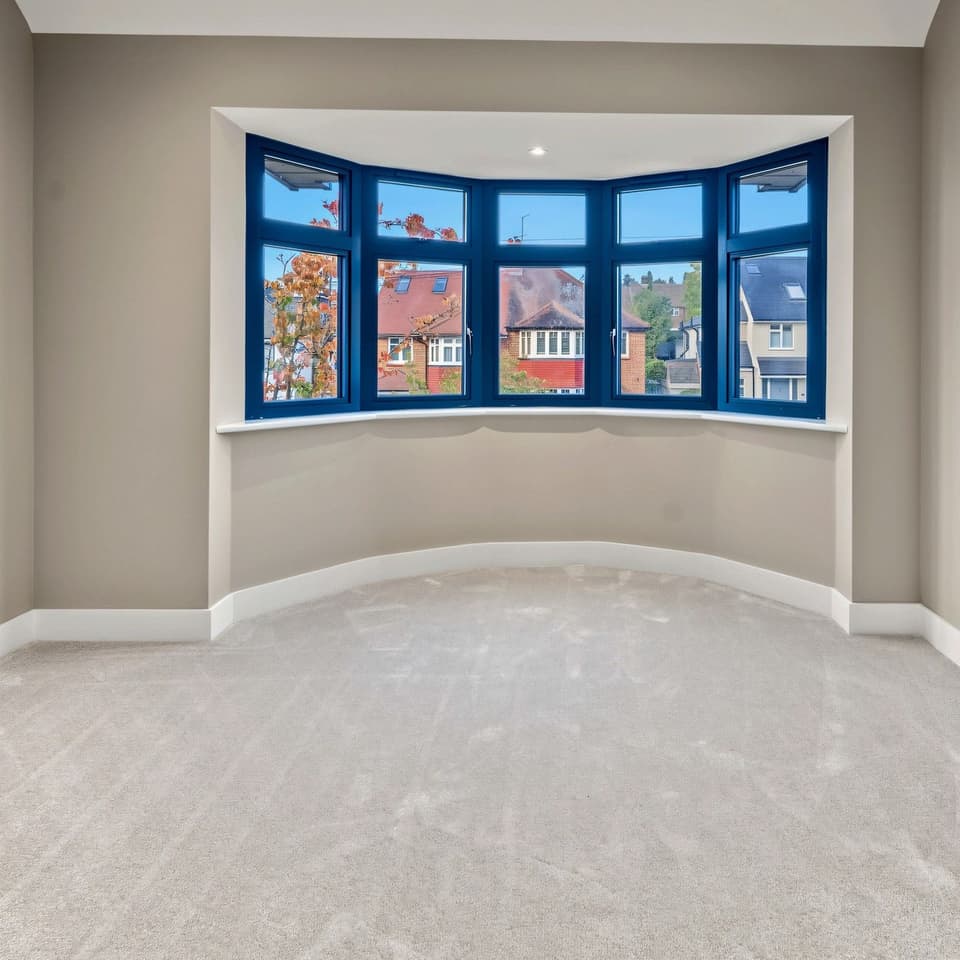
Bay bedroom 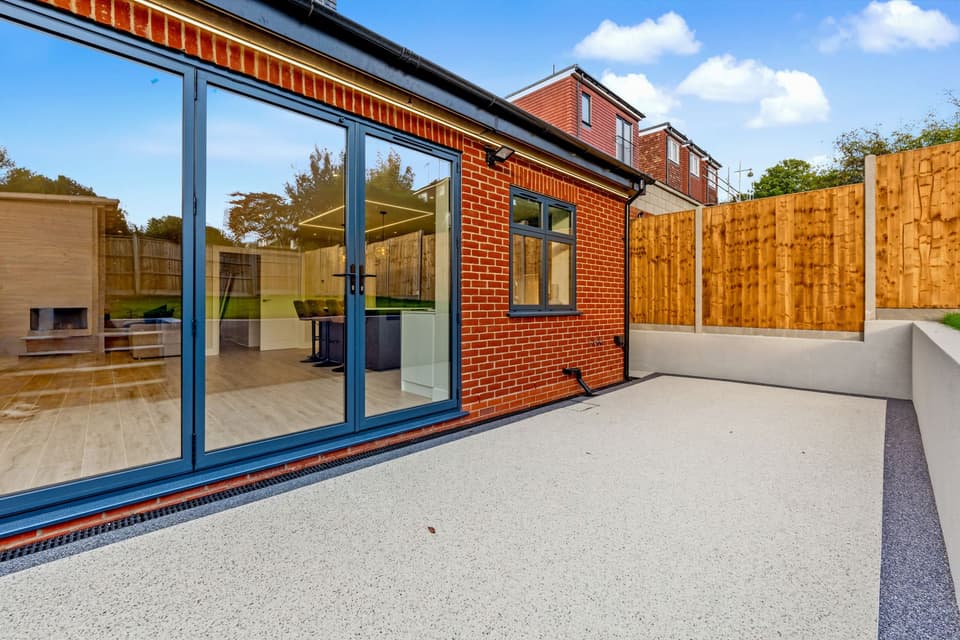
Bi-fold doors to the patio


From the page to the finished home
Side by side: the drawing on the left, the finished home on the right.
Front elevation
EXAMPLE DRAWING FINISHED Rear elevation
EXAMPLE DRAWING FINISHED Kitchen and lighting
EXAMPLE DRAWING FINISHED The recessed LED line replaced the ceiling coffer that was first drawn over the island.
Wet room
EXAMPLE DRAWING FINISHED
See your home built, before we start
Once you sign, we sit down with you and show you how your home will be built, stage by stage: what you’ll see on site, what we check before anything is covered, and what you pay at each step. You’ll know what happens at each stage. A 3D walk-through of your home is also available on request.
- 16 stagesfrom site set-up to handover
- About 16 weekson site
- 5% depositthen 5 stage payments, each for completed work
Figures for the example extension shown below. Yours are set out in your quote and written programme.
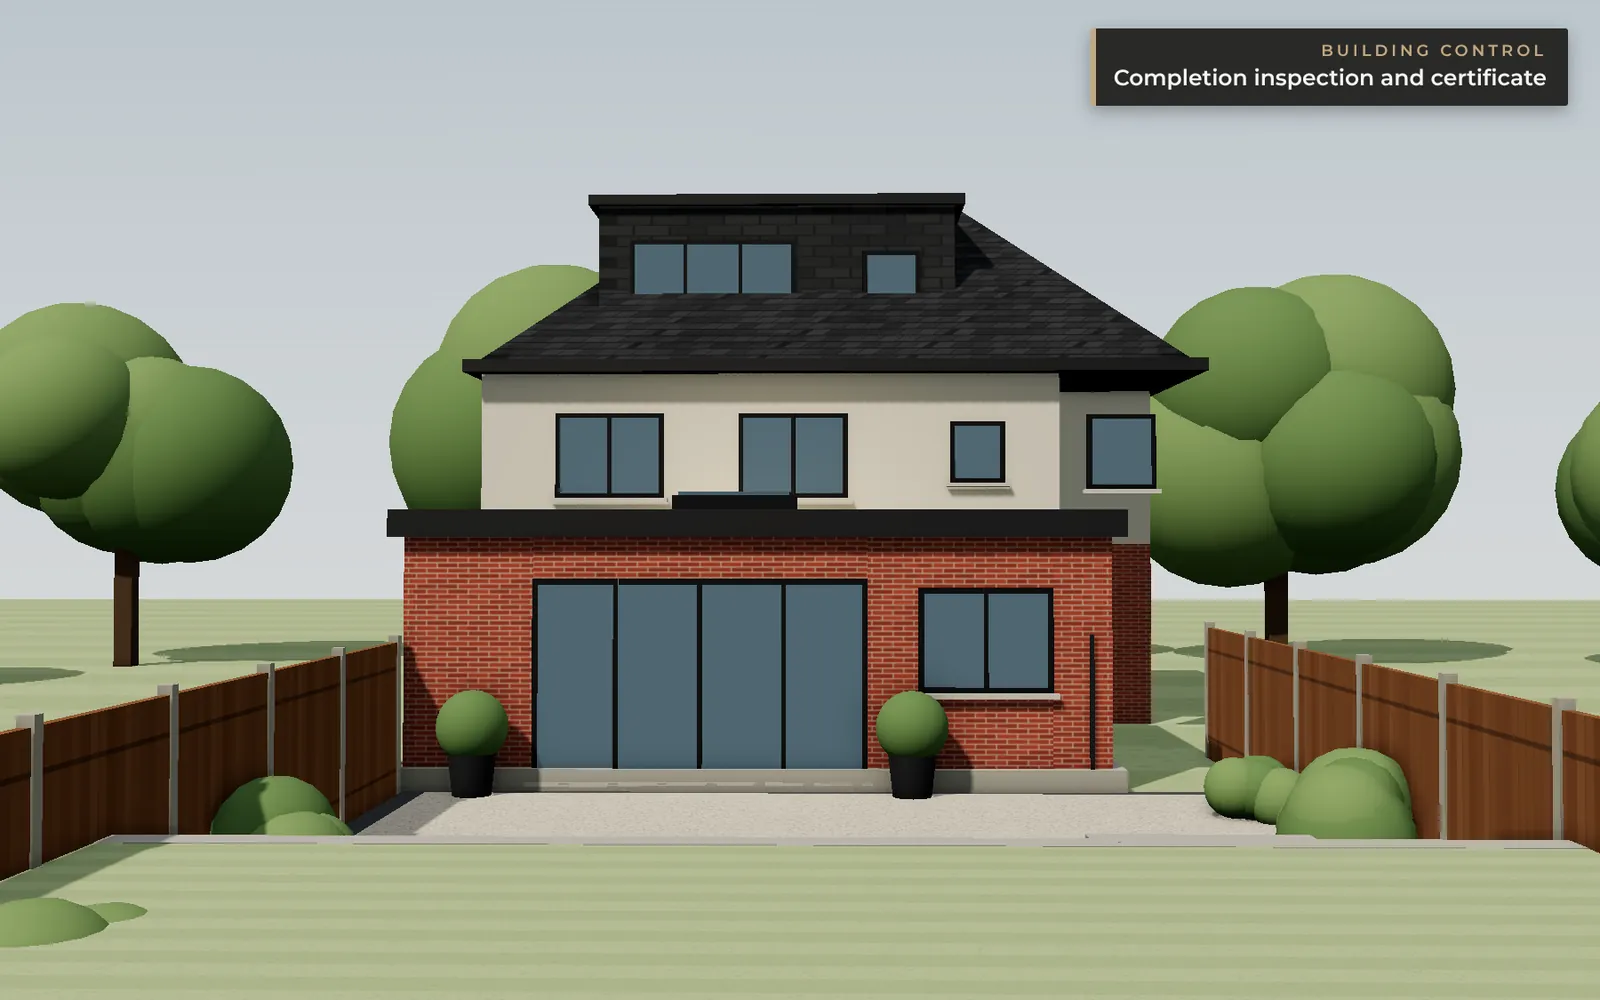
Shown: the finished extension. Press Play the build to watch it go up from week 1.
Gold markers show the stages where Building Control is notified or inspects the work.
Snagging, completion and handover
What you’ll see Outside works, a snag walk-round together, then the keys.
What we check Snags put right before handover; heating controls and commissioning information handed over; electrical, gas, glazing and drainage certificates in your handover pack.
Building Control We send Building Control the completion notice with the signed declarations from you, your principal designer and us as principal contractor that the law requires; they then issue the completion certificate (or the final certificate, if a registered building control approver is used).
See all 16 stages as a list
- 1. Site set-up and protection Week 1, indicative. Site fencing, protection for your floors and garden, and welfare facilities for the team. We write to neighbours before we start; where the Party Wall Act applies, the notices and any award come first, and the surveyor records the neighbouring walls. What we check: Planning (or lawful development) and Building Regulations approval in place; construction phase plan in place; services located and isolated; skip and scaffold licences where they sit on the road. Building Control: We give Building Control notice at least 2 days before work starts, and confirm the start date within 5 days.
- 2. Setting out and clearing Week 1, indicative. The old patio or path is cleared and the extension is set out on the ground, with profiles and string lines taken from your approved drawings. What we check: Setting out checked against the drawings and your boundary; underground services traced and marked; neighbouring walls recorded before any digging.
- 3. Digging the foundations Week 2, indicative. Trenches about 600 mm wide and typically 1 m or more deep (deeper on clay or near trees, as your engineer sets). What we check: Depth and ground checked against your engineer’s design; the existing house footing exposed where we join it; heave protection where trees are nearby on clay. Building Control: Building Control inspects the open trenches before any concrete goes in.
- 4. Concrete foundations Week 2, indicative. Trench-fill concrete poured to just below ground level, once the trenches are approved. What we check: Concrete level and setting.
- 5. New drains Week 3, indicative. New drains laid on a gravel bed to the falls on your drawings, running to an inspection chamber. What we check: Build-over consent from the water company where we build over or within 3 m of a public sewer; falls and joints checked; drains tested. Building Control: Building Control inspects the drains before they are covered, and can witness the drain test once they are backfilled.
- 6. Walls up to the damp-proof course Week 3, indicative. Blockwork below ground, then brick up to the damp-proof course, at least 150 mm above ground. What we check: Cavity filled below ground; damp-proof course level, lapped at joints and ready to link to the floor membrane. Building Control: Building Control inspects the new walls and damp-proof course.
- 7. Ground floor slab Week 4, indicative. Hardcore, sand blinding and a damp-proof membrane, then the concrete slab. Insulation and screed come later, once the roof is on. What we check: Membrane lapped, taped and linked to the damp-proof course; slab set low enough for insulation and screed to finish flush with the house floor. Building Control: Building Control inspects the membrane before the slab is poured.
- 8. Cavity walls go up Weeks 5 to 6, indicative. Inner blockwork, cavity insulation and the outer leaf in brick (or block for render), built together course by course from the scaffold. What we check: Insulation tight with no gaps; stainless wall ties at the spacing set; cavity trays, weep holes and insulated cavity closers at openings; brick matching the approved sample panel. Building Control: Building Control can inspect the wall insulation and cavity details before they are built in.
- 9. Steel beam and temporary works Week 6, indicative. Temporary props hold the house while the steel beam goes in on padstones. The lower part of the old wall stays in place as a temporary seal. What we check: Temporary works designed by a structural engineer we appoint, independently checked and released for loading by our Temporary Works Coordinator; steel size, padstones, bearings and fire protection to your engineer’s drawings. Building Control: Building Control checks the steel, padstones and bearings.
- 10. The roof Weeks 7 to 8, indicative. Roof joists, deck, insulation and waterproof covering, with the rooflight upstands and fascia. What we check: Joists strapped to the walls; finished falls of at least 1:80; insulation to your designer’s specification; flashing and cavity tray where the roof meets the house; covering sealed at every edge. Building Control: Building Control inspects the roof structure and insulation before they are covered.
- 11. Windows, doors and rooflights Week 9, indicative. Your chosen glazing goes in, in the frame colour you picked. Large glazing is measured once the opening is built; we board it securely until then. What we check: Openings square; seals and thresholds; safety glass where required; glazing certificates kept for your handover pack.
- 12. Break-through, insulation and screed Weeks 9 to 10, indicative. With the extension watertight, the old wall comes out and the two spaces become one. Anything that runs under the floor goes in first, then floor insulation, underfloor heating pipes (if chosen) and screed across the whole room. What we check: Pipes and cables under the floor (for example to a kitchen island) fitted to your signed Layout Sign-Off, tested and photographed before screed; underfloor heating pressure-tested and kept under pressure while screeding; levels flush with the house. Building Control: Building Control can inspect the floor insulation before it is screeded.
- 13. First fix electrics and plumbing Weeks 10 to 11, indicative. Cables, pipes and back boxes go in to the positions on your signed Layout Sign-Off, before anything is covered. What we check: Every position checked against your Layout Sign-Off; extract fans and trickle vents to your designer’s specification; smoke and heat alarms as Building Control requires; pipework pressure-tested.
- 14. Plastering Weeks 11 to 12, indicative. Walls and ceilings boarded and skimmed, ready for decoration. What we check: Insulation and airtightness photographed before they are covered; plaster left to dry properly before decorating.
- 15. Kitchen, second fix and finishes Weeks 12 to 15, indicative. The kitchen and worktops, then sockets, switches and lights, then floors and decoration in your chosen colours. What we check: Worktops templated after the units; electrics tested and certified through our electrician’s competent person scheme; screed moisture tested before floor finishes.
- 16. Snagging, completion and handover Weeks 15 to 16, indicative. Outside works, a snag walk-round together, then the keys. What we check: Snags put right before handover; heating controls and commissioning information handed over; electrical, gas, glazing and drainage certificates in your handover pack. Building Control: We send Building Control the completion notice with the signed declarations from you, your principal designer and us as principal contractor that the law requires; they then issue the completion certificate (or the final certificate, if a registered building control approver is used).
- Walk through it in 3D, on requestAsk for a 3D walk-through of your approved drawings, so you can picture every room before a wall goes up.
- Watch it go up, stage by stageWhat happens, what we check, when Building Control inspects, and what it means for your home.
- Know every payment and decisionA 5% deposit, then only for completed work, and the decisions still open in your design, with the dates we need them by. Then every light, socket and switch is agreed on the VATRA Layout Sign-Off.
Images are computer-generated from an example design; your Studio is built from your own approved drawings, and finishes and timings will differ. The VATRA Studio presents your designer’s approved drawings. We don’t design: your designer and engineer are responsible for the design, we are responsible for building it to that design and to the Building Regulations, and Building Control checks the work independently. Stage timings shown are indicative; yours are confirmed in your written programme.
See how it will look before you choose
We show you the options, in 3D if you ask, from the start of your build to the end, so you can compare them side by side before anything is ordered.
Good construction starts with good decisions.
The VATRA Studio helps you understand your home before it is built: how your designer’s drawings will look in real life, the decisions still open, and when each one is needed. You go into the build knowing what you’re getting, and with fewer surprises once work starts.
Your VATRA Studio is given once you sign, built from your own approved drawings. We don’t design: your designer and engineer are responsible for the design, we are responsible for building it to that design and to the Building Regulations, and Building Control checks the work independently. On a project with an architect, they see the walkthrough first and are invited to it, and any design question you raise goes to them in writing.